Tales of Home…SNOW DAY! On a Sunday?
Hi! I’m Melina, homeschooling mother of 11 and Grandmelina to 4 1/2!
FOR THOSE EXPERIENCING A LARGE DUMPING OF SNOW TODAY, HOW MANY WILL ATTEMPT THE DRIVE TO CHURCH?
+
This is always the question in this weather, isn’t it? Very few make it, sometimes only those who live closest to the Church. We live right next door to our Church, so no problems for us. But our priest doesn’t. He lives in a nearby town and has 3 churches to serve. He can’t always make it when road conditions are bad, and today we are supposed to have a replacement retired priest who is driving even farther from his home. We should know soon enough if we will be having mass today.
+
Yes, we live in an old rectory in a small town. We bought our home over 17 years ago. I can always remember how long, because David will be turning 18 in March and he was the baby when we moved. And we moved on September 29th. I always remember this date because it is my sister’s birthday. Our home was built in 1885 and is a piece of local history.
+
What is it like living in an old rectory? Sweet! Six bedrooms. Two full baths and a half bath. A large kitchen, dining room and living room. Perfect for our family of 13. The larger dining room meant we didn’t have to eat supper in shifts anymore, and as the kids got older more could gather around the table to do their school lessons. The additional bedrooms meant fewer kids to a room. Our last house also had 3 bathrooms, but it is still very sweet. And red bricks. Old bricks have so much character.
+
But did I mention it’s an old rectory? So it came with old house challenges. That first winter we were sooo cold. No insulation. Blew some in the following summer. Much better. New windows came after a large tree blew down on our house in a storm. A blessing. House was still standing and thank you God nobody got hurt. We bought and installed the windows ourselves with the insurance money. No more old, brittle glass wooden windows. Another heating savings. Installed a gas furnace and got rid of the oil fired boiler. Another huge heating savings. Most of the brown panelling has been replaced with insulation and drywall and new paint. More recently, the orange shag carpet is gone. Looking better all the time! Roof is now metal so that we’ll never have to worry about it again. Then there is the basement. It flooded with a river that first Spring thaw. Now we’ve got it down to a smaller trickle. Unfortunately, we still have a wet basement every Spring. It’s build right on rock so we can’t get it better than it is, even with a sump pump and digging up around the house. Oh, well. I still love our house. And my husband, because he did all this for us. Isn’t he amazing? I am blessed beyond deserving. God is good.
+
And did I mention we live next to our Church? Yup. That is AWESOME! It is my home away from home. And small towns rock. I’ll tell you more about it soon. Right now I’ve got to go get everything and everybody ready for Church…just in case! HAPPY SUNDAY!
Garlic Spare Ribs
Hi! My name’s Melina, homeschooling mother of 11 and Grandmelina to 3 1/2!
My mom made this recipe when we were growing up, and she got the recipe from my Auntie Joyce. Some of my kids will request this meal for their birthday. I like to serve it with rice.
I’m teaching my youngest girls to cook, so this will be their creation today as we celebrate the opening of the Lord’s Day. Served with rice and veggies and cake for dessert.
And of course, I have to quadruple the sauce to cover all our ribs!
I cut up my pork ribs and boil them for 15 minutes, drain and add them to the Garlic Sauce below.
GARLIC SAUCE for ribs:
- 1/2 cup ketchup
- 1 cup Cola
- 2 Tbsp. dry mustard
- 1/2 cup soy sauce
- 1 cup brown sugar
- garlic – to taste
Combine all ingredients in a tall pot. Heat to boiling. Boil 2-3 minutes. Remove from heat. Add your cooked ribs to the sauce. The longer you let the ribs sit, the more flavour seeps into them. Reheat as necessary and serve with rice.
The ribs are even better made a day ahead and allowed to soak in the sauce in the fridge overnight.
Auntie Joyce says that after coating the ribs in sauce, she bakes them in the oven for an hour to caramelize the sauce. My cousin Danny called them candy meat.
Enjoy!
Note: we have different food restrictions in our house, so I change up the sauce a bit. I use caffeine free cola and eliminate the soy sauce, but add salt. Still good!
POTATO BUNS and our Summers at Waupoos
Hi! I’m Melina, homeschooling Mother of 11, and Grandmelina to 2 1/2!
Thanks for stopping by.
Our summers wouldn’t be the same without a vacation at Waupoos. Waupoos Family Farm is a cottage vacation for families who otherwise wouldn’t be able to afford a vacation. The kids and I have been Host Family for a week these past 10 summers – and we love it!
Because Waupoos gets funding to hire student staff, the Host Family gets lots of time to relax and enjoy their week. We get to swim in the inground pool, go on wagon rides, enjoy the farm animals, help ourselves to the garden and fresh eggs, sing at the campfire, make arts and crafts, play pool and ping pong, slide and swing, hang out in our cottage, and of course we get to visit with old friends and make new friends.
Besides visiting (lovingly referred to as poolside ministry) and running morning chapel, we also organize games, crafts, movie nights, pancake lunches and baking.
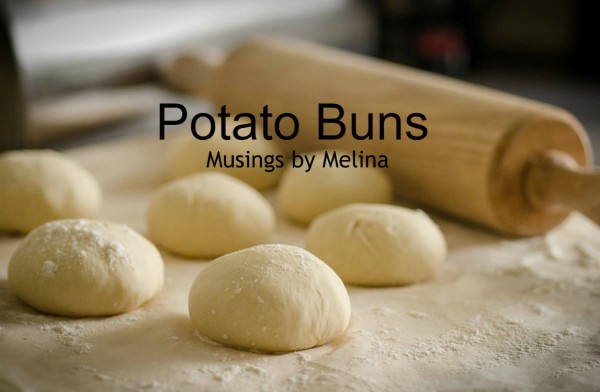
This was one of our recipes that we made together, and enjoyed tremendously. Hope you enjoy it too!
POTATO BUNS RECIPE (makes approx. 100 buns, adjust recipe as needed)
Mix in a large bowl:
- 5 cups scalded milk (or warm water)
- 2 cups mashed potatoes (no liquid added)
- 1 cup fat (butter or margarine)
- 1 cup sugar
Let cool to lukewarm, then add:
- 6 cups flour
- 3 Tbsp. quick rise yeast
Let stand for about 20 minutes.
Add:
- 2 eggs, beaten
- 1 Tbsp. salt
- 11-12 cups additional flour
A little more flour may be needed, but dough should be soft. Turn out onto a flour dusted cookie sheet, and knead, dusting dough and cookie sheet with more flour as needed, until dough is no longer sticky and is satiny. Let raise in warm place until doubled in size.
Shape dough into buns and place on greased pans. Let raise in warm place until almost doubled in size, then bake at 400°F, starting on lower rack and changing to upper rack about halfway through for 15 minutes total of baking time. After removing from oven, brush tops lightly with melted butter to remove any flour and soften dough.
SPICED DOUGHNUT RECIPE
 Hi! My name is Melina, homeschooling mother of 11 and Grandmelina to 2!
You can also find this recipe at Women of Laughter and Faith.
Deep fried food – the ultimate comfort food as the cold weather creeps in. Fall has definitely arrived!
It was quite chilly today as I took my rosary walk, but the trees with their colourful leaves were beautiful, and the dried leaves on the ground were crunching underfoot. I have to admit, I take WAY too much pleasure in crunching leaves!
This recipe was passed on to me by my mother-in-law, a favourite of my husband’s while he was growing up. The nutmeg adds just the right amount of flavour, and a coating of cinnamon and sugar top them off nicely.
We usually make these in the traditional doughnut shape, but one Easter I used a bunny cookie cutter and made rabbit doughnuts that were very popular…so use your imagination and create something unique!
DOUGHNUT RECIPE (375°F oil)
- 3 cups flour
- 4 tsp. baking powder
- 1/2 tsp. salt
- 1/4 tsp. nutmeg
- 1 cup sugar
- 3 Tbsp. butter
- 1 tsp. vanilla
- 2 eggs
- 2/3 cups milk
Measure flour and add baking powder, salt and nutmeg; stir well to blend. Cream sugar, butter and vanilla thoroughly. Beat in an egg one at a time, mixing well after each addition. Add dry ingredients and milk alternately. Chill dough 2 hours.
Roll out 1/2 inch thick. Dough is very sticky, flour generously. Cut into doughnut shapes using a doughnut cutter (you can alternately use 2 different sizes of cups). Fry in 375°F oil (I usually use Canola oil, but any vegetable oil will work). I use a wok, but my mother-in-law used a cast iron pan. Just make sure the oil is deep enough for the doughnuts to float. The dough should rise to the top right away. Make sure to flip the doughnuts in the oil to cook both sides. It doesn’t take too long. Cook in batches, removing the doughnuts and placing on paper towels or paper bags for oil absorption.
OPTIONAL COATING
Mix granulated sugar and cinnamon to taste in a bag. Add hot doughnuts and shake to coat. Remove and cool before eating.
Hot Cross Bun Recipe and Good Friday
Hi! I’m Melina, homeschooling mother of 11 and Grandmelina to 2!
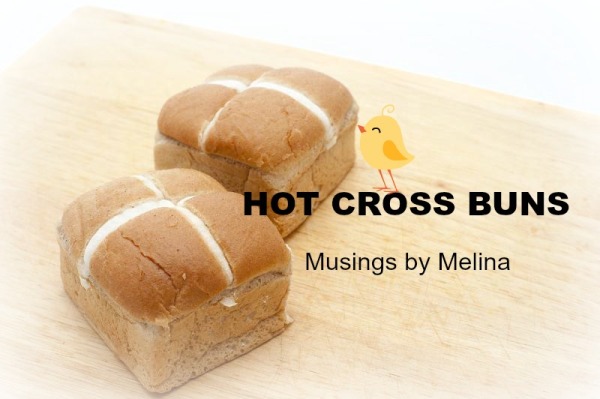
Good Friday wouldn’t be the same in our house without freshly baked hot cross buns. I start them late in the morning, and serve them fresh after we pray our Mercy Chaplet at 3pm. Until we eat those delicious buns, we eat nothing – fasting in remembrance of the death of Jesus.
After our evening Way of the Cross at our church, led by our youth (including some of mine!), we come home to the soft light of candles and spend an evening with the lights off playing games as a family. We have candles lit, but we also use some battery powered camping lights too (for safety’s sake). We avoid the computer and other social media to complete our day of sacrifice. We did this every Sunday during Lent also, and everyone enjoyed it.
Check out some of our other Easter weekend traditions here. What is your favourite Easter tradition?
I make a triple batch with raisins, and a single batch with no raisins/currants. Lots of mouths to feed!
Good Friday Hot Cross Buns
Bakes at 375°F for about 20 minutes.
- 1/4 cup oil (I use olive. You can also use butter.)
- 1 egg, room temperature
- 1/2 cup sugar
- 3/4 tsp. salt
- 1/2 tsp. cinnamon
Add the above ingredients to a large bowl and beat them together using an electric mixer. Add:
- 1 1/4 cups warm milk or water
- 1 cup all-purpose flour
- 1 Tbsp. quick rising yeast
Beat the mixture again. Add:
- 3/4 cup raisins or currants
- 2 1/4 more cups of all-purpose flour
- 2 Tbsp. cut candied peel (This is optional, and I don’t usually add it.)
Stir mixture with a large spoon or spatula. Mix well. You may need to add a bit more flour to make a soft dough. Dump the dough out onto floured surface (I like to use a cookie sheet with sides to contain the mess and make clean up easier.) Let the dough rest for 10 minutes and then knead it until it is smooth and elastic. Place some oil in the bowl and return the dough to the bowl. Turn the dough in the bowl to completely coat the dough and bowl in oil. Cover, place in a warm place and let rise until double in size (about an hour).
Punch dough down. Shape into about 16 balls. Place on greased baking sheet, allowing room for expansion. Cut a deep cross in each bun with a sharp knife. Cover and let rise again until light and almost double in size.
Bake in 375°F oven for about 18-20 minutes. Remove from oven. Brush with butter and allow to cool before eating (It’s hard to wait, but worth it!).
Enjoy!
My Easter Letter and a Free Printable

Hi! I’m Melina, homeschooling mother of 11 and Grandmelina to 2!
This year I decided to start the tradition of writing an Easter letter of thanksgiving to my Saviour. Why not make it part of your Easter traditions too!
My Easter letter:Jesus, how can I thank you for all you’ve done for me? You suffered and died for me, You rose after 3 days in the tomb and You redeemed me. Because of Your sacrifice, when I enter the confessional and confess, I am absolved of my sins and made whole again. I am made whiter than snow.This week, I got to experience that awesome feeling of being whiter than snow once again. Thank you for that gift in my life. I really and truly am in love with Your church and all the good it has to offer me.When I am at mass and receive You in Holy Communion, my heart swells with love for You. How blessed I am to be chosen by You! How blessed I am to know you! How blessed I am to serve You!I am once again reduced to tears of gratitude to think of all You do for me! Not only at that first Easter but every day of my life.I want nothing more than to serve You with My whole heart. I don’t want to hold any part of my heart and my life back from You. I am yours. Thank You for being mine.
Easter 2001 and my First Miscarriage

Hi! I’m Melina, homeschooling mother of 11 and Grandmelina to 2!
The thing each expectant mother dreads: miscarriage. It was the year 2001. I started spotting on Good Friday. What a fearful sight! This was my 8th pregnancy, but my first experience with a miscarriage. I was scared, but I started working on an action plan right away.
I knew that I had to take it easy if I wanted to try to save this baby growing within me. My mother had successfully saved my brother with complete bed rest for most of her pregnancy.
How could I manage doing nothing for the next 6 months??? I had 7 children already, and my oldest was only 8 years old. Just the thought was overwhelming. Even though I didn’t choose complete bed rest, I did decide that I would try to avoid anything strenuous, take life at a slow pace and avoid heavy lifting. I was still planning lots of bed rest and ready to get the kids to help in every way possible. I was willing to sacrifice for this little one.
This first day though was a shock. My husband was off for the weekend. He would take care of the kids and the house, and I was to spend the weekend in bed. All plans were cancelled. This left me with plenty of time by myself to think.
I remember laying in my bed listening to the sound of my family beyond my closed door. Even though I tried, sleep evaded me.
I thought only of this little one growing within me. I gently caressed my belly, my heart filled with love and my eyes filled with tears.
It had actually been a very hard year so far. I won’t go into details here, but trust me when I say it was hard. I had already been through so much. I sure didn’t want to go through this now. I was afraid and I was hurting. In the silence of my bedroom, my soul cried out to God. I reached out to Him, and He answered. The fear lessened and I trusted. No matter what happened, God held me and my little one close to His heart.
Saturday morning arrived. I had spent the previous day in bed, with visits from my kids. The littlest had snuggled with me and nursed whenever he was hungry. My husband had quite competently taken care of everything else. Now, I spent a little time with the kids at the kitchen table and we decorated Easter eggs. Then back to bed. Except for the eggs, I got out of bed only for supper and for the bathroom.
I think this was the least I had done since my first child was born. I just slept, read, ate and prayed. God knew that I needed a rest. I just wish it hadn’t come with such a price.
Sunday morning I miscarried my baby. Even though I had known from the beginning that this was a possibility, it still hit me. I felt empty. What was I supposed to do now? How was I supposed to feel? It was like life was going on around me and I wasn’t a part of things. I did however feel peace. I thought this was the wrong thing to feel, yet it persisted.
My husband piled the kids into the van and drove us to the hospital. They took me in right away. A quick exam revealed that it had been a complete miscarriage and nothing more was needed.
I remember the doctor asking me if this was a wanted pregnancy. Assured that it was, he then expressed his condolences. I wasn’t insulted by his question, just saddened by it. What kind of society do we live in when a doctor needs to ask this question first?
I was alone during all of this because my husband was watching our 7 kids in the waiting room. It didn’t take long though before I was released and we were on our way.
We were home before noon. Easter morning mass would have just ended. The kids were finally able to eat their Easter treats and that kept them busy for the rest of the day. I again took myself to bed, this time to rest and recover. Again, there was so much quiet time to think and to pray.
It wasn’t lost on me that this miscarriage had begun on Good Friday and had ended on Easter morning. I thought of Jesus as He hung from His cross on that first Good Friday. He gave His life in sacrifice for us so that we might have eternal life. It was as if He spread His arms wide and said, “I love you THIS much.” My little one was most likely dead on Good Friday too. He imitated His Saviour and reminded me of His love.
That first Easter morning revealed Jesus’ resurrection. Death had no victory over Him. He had conquered evil, and now evil knew it had no power over Him. Jesus was Life, and He gives us life, life to the fullest, when we trust in Him.
Now we had our own resurrection to celebrate, a real reminder of Jesus’ resurrection. Every Easter would be a chance to remember. My life, and the life of my little one, had always been in Jesus’ hands. That didn’t change now just because my little one was no longer here with us. His life continues.
Heaven is the life we all aspire to. A life where there is no more pain, no more death. It is also the life I aspire to for each of my children. Knowing that I had a little one already in heaven was a victory to me.
A life where there is no more pain, no more death. This was God’s promise to me as it is to each of us. All these struggles I had been going through this year, they were nothing in the grand scheme of things. Jesus had already conquered evil. God had a plan for my life. I was to love and care for those God entrusted to me, and raise them in full knowledge that God also had a plan for their lives. A plan they could trust. This is why I was filled with peace, because I trusted.
And always I would come back to my favourite scripture passage: And she laughs at the days to come (Proverbs 31:25). This reminded not to worry about the future and what will happen. I have no control over most of what will happen. So enjoy today, God’s gift to me.
I would miss this little one that I never got to hold in my arms. I would never get to watch him grow, never hear him laugh. However, I believe He is somewhere even better than anything I can ever imagine. I believe that he prays for me and his family. I believe I will meet him one day.
Our own little saint – perfect in every way.
This post can also be seen on Women of Laughter and Faith.
A Christian Passover Seder Meal

Hi! I’m Melina, homeschooling mother of 11 and Grandmelina to 2!
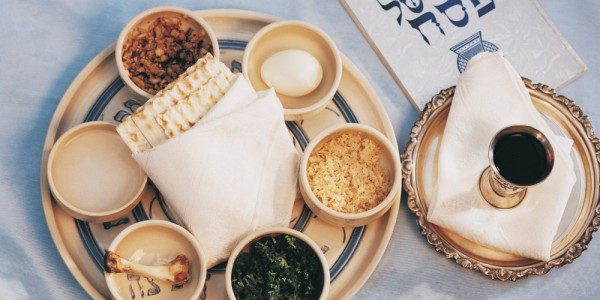
The Passover Seder Meal is the same meal Jesus shared with His disciples at the Last Supper before His crucifixion. The Seder Meal is a yearly reminder of all the great things God has done for us and continues to do for us. It is a time to remember and to celebrate!
Our family celebrates this meal each year, and I encourage you to start this tradition in your family too. We don’t usually have this meal on the Passover, but choose a day (often the Sunday before Easter) when it is convenient to get people together.
We usually split the prayers between the different people at the meal, with the youngest boy asking the question: Why is this night different from all other nights?
We add songs to our Seder celebration and make it a time of joy and coming together. My favourite part is when we list all God did for His people and answer: It would have been enough for us.
Even though this is not the format we use, I really like the simplicity of the one from Godventure to use with families. They have a printable pdf for you to use.
Make the meal special by including a tablecloth and flowers, special dishes and some wine (or sparkling grape juice), and of course candlelight.
Make sure your meal is prepared before the celebration. Keep warm until ready to serve. A couple of reminders when preparing the meal: no leavening is used at the Passover, so no bread and desserts will have no leavening (ice cream, cheese cake, pie…), and pork is never eaten by Jewish people and should not be served.
As shown in the above picture, you will need a few ceremonial foods placed on a platter:
charoset – a salad made of apples, walnuts (opt.), grape juice and cinnamon to represent the mortar used by the Jewish slaves in Egypt. It can be made ahead of time and kept refrigerated. Check out THIS RECIPE or find one of your own online.
unleavened bread – there was no time for leavening the bread when the slaves escaped from Egypt. This is best served fresh. Check out THIS RECIPE or find one of your own online.
You will also need a lamb bone (you may cook lamb for the meal or ask your butcher for one), prepared horseradish, parsley or lettuce, an egg, and salt water. A Cup of Elijah will be a glass of wine/grape juice set aside and not used for the meal or the ceremony. A couple of candles will also be needed as well as a wine glass to fill and pass around the table.
Besides the salt water and parsley on the ceremonial platter, place a few on the table to be shared during the ceremony. Make enough charoset, unleavened bread and hard boiled eggs to serve with the meal.
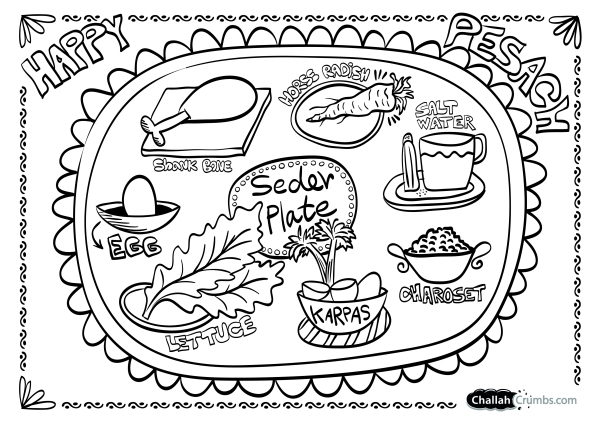
And how about a colouring page for the kids? It will help them remember the meal.
Other Easter and Lent posts that may interest you:
Meatless Lenten Meals for kids (and adults!)
LENT – A Time to Fast, A Time to Grow
Lent – a Time for Spiritual Growth
Nanny’s White Bread and the Bear Who Came to Visit

Hi! I’m Melina, homeschooling mother of 11 and Grandmelina to 2!
We grew up to the smell of baking bread. We enjoyed walking up to the house and smelling that wonderful smell even before we got to the open front door. But we weren’t the only ones who enjoyed that heavenly smell.
First, a little background. For a couple of years my family owned and ran a campground in the 1970’s up near Timmins, Ontario. Yes – every kid’s dream. I loved it! We lived in a chalet overlooking Nighthawk Lake. Sometimes we even had visitors arrive by seaplane. We would watch them land on the lake and ferry up close to shore.
What adventures we had! We had private islands, we would walk the rocky shores and explore, we even found an abandoned cabin in the woods. All summer we would swim, play in our treehouse and sunbathe. Every child camping was a new friend. No wonder I loved it.
But back to that heavenly smelling bread. One day, while Mom was baking bread, she heard a noise at the door, only to look up into the hungry face of a bear! She managed to scare the bear away only to realize that it was headed up towards the campers, where kids often played outside. She bravely grabbed her broom to chase after that bear.
Even though I wasn’t there at the time, I can picture Mom waving her broom and yelling at the bear – then bravely hiding behind the nearest tree. Of course, she had to do this more than once. Even though we laugh about it now, I’m sure Mom was doing anything but laughing at the time. And she saved the day! That bear took off into the woods in the opposite direction from the campers.
A trap was set up right after that, and that bear was moved to another location, far from our campground. All I know is that he never made it back to our front door again.
Mom learned to bake bread and got this recipe from her friend Pat and we have enjoyed it ever since. Thanks Pat!
This makes a big batch, so feel free to adjust as necessary.
Nanny’s White Bread/Buns (Makes 5 loaves, or several dozen buns)
Bakes at 375°F.
- 12 cups white flour
- 2 Tbsp. instant yeast
- 6 cups hot water (not boiling)
- 1 cup cooking oil
Add the yeast to the flour and blend in well. Add the oil to the hot water. Now add the water and oil mixture to the flour and yeast mixture. Start by mixing it all with a large spoon. Eventually you will have to start mixing it with your hands. Make sure that all of the flour gets mixed in.
Now, cover the table (or a large baking sheet to cut down on the mess) with flour and dump the dough out onto it. Sprinkle flour over the dough and begin to knead the dough by rocking it gently back and forth with the heal of your hands a few times, folding it, turning it and kneading some more. Keep your table covered in flour so that the dough doesn’t stick, and keep sprinkling flour on the dough so that it doesn’t stick (too much!) to your hands. Continue kneading for about 5 minutes until the dough is smooth and no longer sticky.
Grease the sides and bottom of a large bowl. Place the dough in the greased bowl. Cover the dough with a clean cloth and place somewhere warm. Let the dough rise until double (approx. 1 hour).
Uncover the bowl and punch that dough! Right in the middle! My kids love this part. You can hear the air escaping the dough.
Dump the dough onto a floured table (or floured baking sheet). Knead the bread just until the air bubbles are gone. It doesn’t take long. Shape into loaves of bread and place in greased loaf pans, or shape into buns and place side by side on a greased baking sheet. It is okay if they are touching. Cover with a clean cloth and let rise for 30-45 minutes.
Bake at 375° F for 30 – 40 minutes for loaves, or for 20-30 minutes for buns.
Butter the top of the buns, if desired, while warm. This step isn’t necessary, but will keep the buns soft.
Buns can be bagged and frozen, but taste best served fresh.
Enjoy!
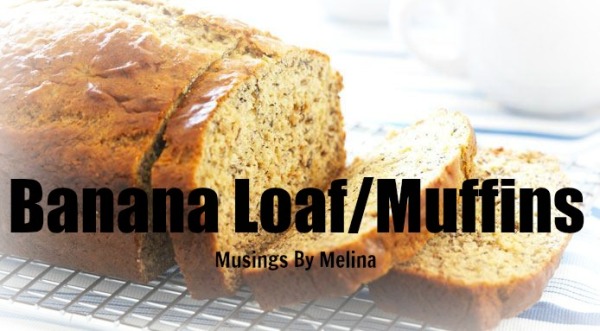
Banana Loaf/Muffins and Our Battle with Food Allergies
Hi! I’m Melina, homeschooling mother of 11 and Grandmelina to 2!
(Dairy free, wheat free alternatives and egg free alternatives.)
When my oldest son was only 5 weeks old, we realized that he had food allergies. I woke in the early hours of the morning with him thrashing in my arms trying to draw a breath. He had aspirated some stomach contents. After spending 10 days in the hospital just before Christmas, his eczema was already starting to flare. Next began the arduous process of elimination, trying to determine what he was allergic to.
He was anaphylactic to eggs, dairy and peanuts, but he also had adverse reactions to wheat, soya, potatoes, tomatoes, garlic, alcohol (through breast milk), fruit with sugar…. We ended up tweaking a few recipes, including this one. This is the original recipe. We ended up changing the wheat flour to oat flour and eliminating the eggs (which makes them heavy muffins – more like a biscuit), but still tasty. Using very ripe bananas gives this recipe a stronger banana flavour.
This recipe is often requested as a birthday dessert in our home. For those special occasions, I will ice the muffins (cupcakes) or make a broiled coconut topping on my cake.
This is a great recipe that earns me many compliments wherever I bring it. Enjoy!
Banana Loaf/Muffins
(makes 1 loaf or 12 muffins)
Preheat oven to 350°F (325°F if using a dark coloured pan).
- 1/2 cup lard or shortening
- 1 cup white sugar
- 2 eggs (may be omitted)
- 3 very ripe bananas, mashed
Mix the above ingredients well with a hand mixer. Add:
- 2 cups flour (may replace white flour with oat flour or chickpea flour or gluten free flour)
- 2 tsp. baking soda
- 1 tsp. vinegar
- 1/2 tsp. salt
Mix well with a spatula. Spoon filling into well greased muffin cups 3/4 full , or fill your well greased loaf pan or well greased 9×13 cake pan. Bake for time indicated below in a preheated 350°F oven (325°F oven for dark coloured pans).
Bake muffins for 10 – 15 minutes (until toothpick inserted into centre comes out clean), bake loaf for 45-50 minutes (until toothpick inserted into centre comes out clean), bake 9×13 cake for 30-35 minutes (until toothpick inserted into centre comes out clean).
OPTIONAL BROILED COCONUT TOPPING
for 9×13 pan
- 1 1/3 cup packed brown sugar
- 1/2 cup butter or margarine (or coconut oil)
- 1/4 cup cream or milk (or coconut milk)
- 1 cup shredded sweetened coconut
Combine all ingredients together in a small saucepan and heat and stir on stovetop until hot and sugar is dissolved. Alternately, you can melt the butter in a heat proof bowl in the microwave then add the other ingredients.
Spread over cake. Return to oven on broil until it bubbles well, about 2-3 minutes (watch carefully so that it doesn’t burn).
Remove from oven, cool, and serve.
Enjoy!
